[M1 Mac] XCODE(12.5.1) swift 메모장 만들기(1),(2)
점심시간이나 퇴근 후에 짬짬이 강의를 보며 swift로 메모장을 만들었고 core Data 구현 전까지 공부했다. 보고 따라 하는 건 쉽지만 이해가 완전히 되지 않아 #1 - #2까지의 강의 내용을 정리해보려
truecode-95.tistory.com
이어서 작성해보는 swift 메모장 만들기
8. data source 구현
8-1. MemoListTableViewContoller.swift -> numberOfSection method delete

8-2. tableView method dumyData 숫자를 return

8-3. 아래 tableView method 주석 제거

8-4. 식별자 identifier 값 확인하기

8-5. 메모, 날짜 삽입

override func tableView(_ tableView: UITableView,
                        cellForRowAt indexPath: IndexPath) -> UITableViewCell {
 // cell 이라는 상수에 저장
 let cell = tableView.dequeueReusableCell(withIdentifier: "cell", for: indexPath)

 // 비어있는 cell 상수에 값을 넣어준다.
 let target = Memo.dummyMemoList[indexPath.row] // tableView에서 몇번쨰 cell인지 확인 가능
 cell.textLabel?.text = target.content
 cell.detailTextLabel?.text = "\(target.insertDate)"

return cell
}
9. data view 구현 이론
1. tableView 배치 : 자동으로 배치
2. 프로토타입 cell 디자인 : cell 스타일을 Subtitle로 지정
3. cell identifier 지정 : cell 입력
4. 데이터 소스. Delegate 연결 : 자동으로 연결
5. 데이터 소스. Delegate 구현
10. Data Formatter 활용하기

let fomatter: DateFormatter = {
 let f = DateFormatter()
 f.dateStyle = .long
 f.timeStyle = .none
 f.locale = Locale(identifier: "Ko_kr")
return f
}()
override func tableView(_ tableView: UITableView,
cellForRowAt indexPath: IndexPath) -> UITableViewCell {
// cell 이라는 상수에 저장
let cell = tableView.dequeueReusableCell(withIdentifier: "cell", for: indexPath)
// 비어있는 cell 상수에 값을 넣어준다.
let target = Memo.dummyMemoList[indexPath.row] // tableView에서 몇번쨰 cell인지 확인 가능
cell.textLabel?.text = target.content
cell.detailTextLabel?.text = fomatter.string(from:target.insertDate)
return cell
}
11. 새 메모 화면 구성하기
11-1. navigation Controller 추가
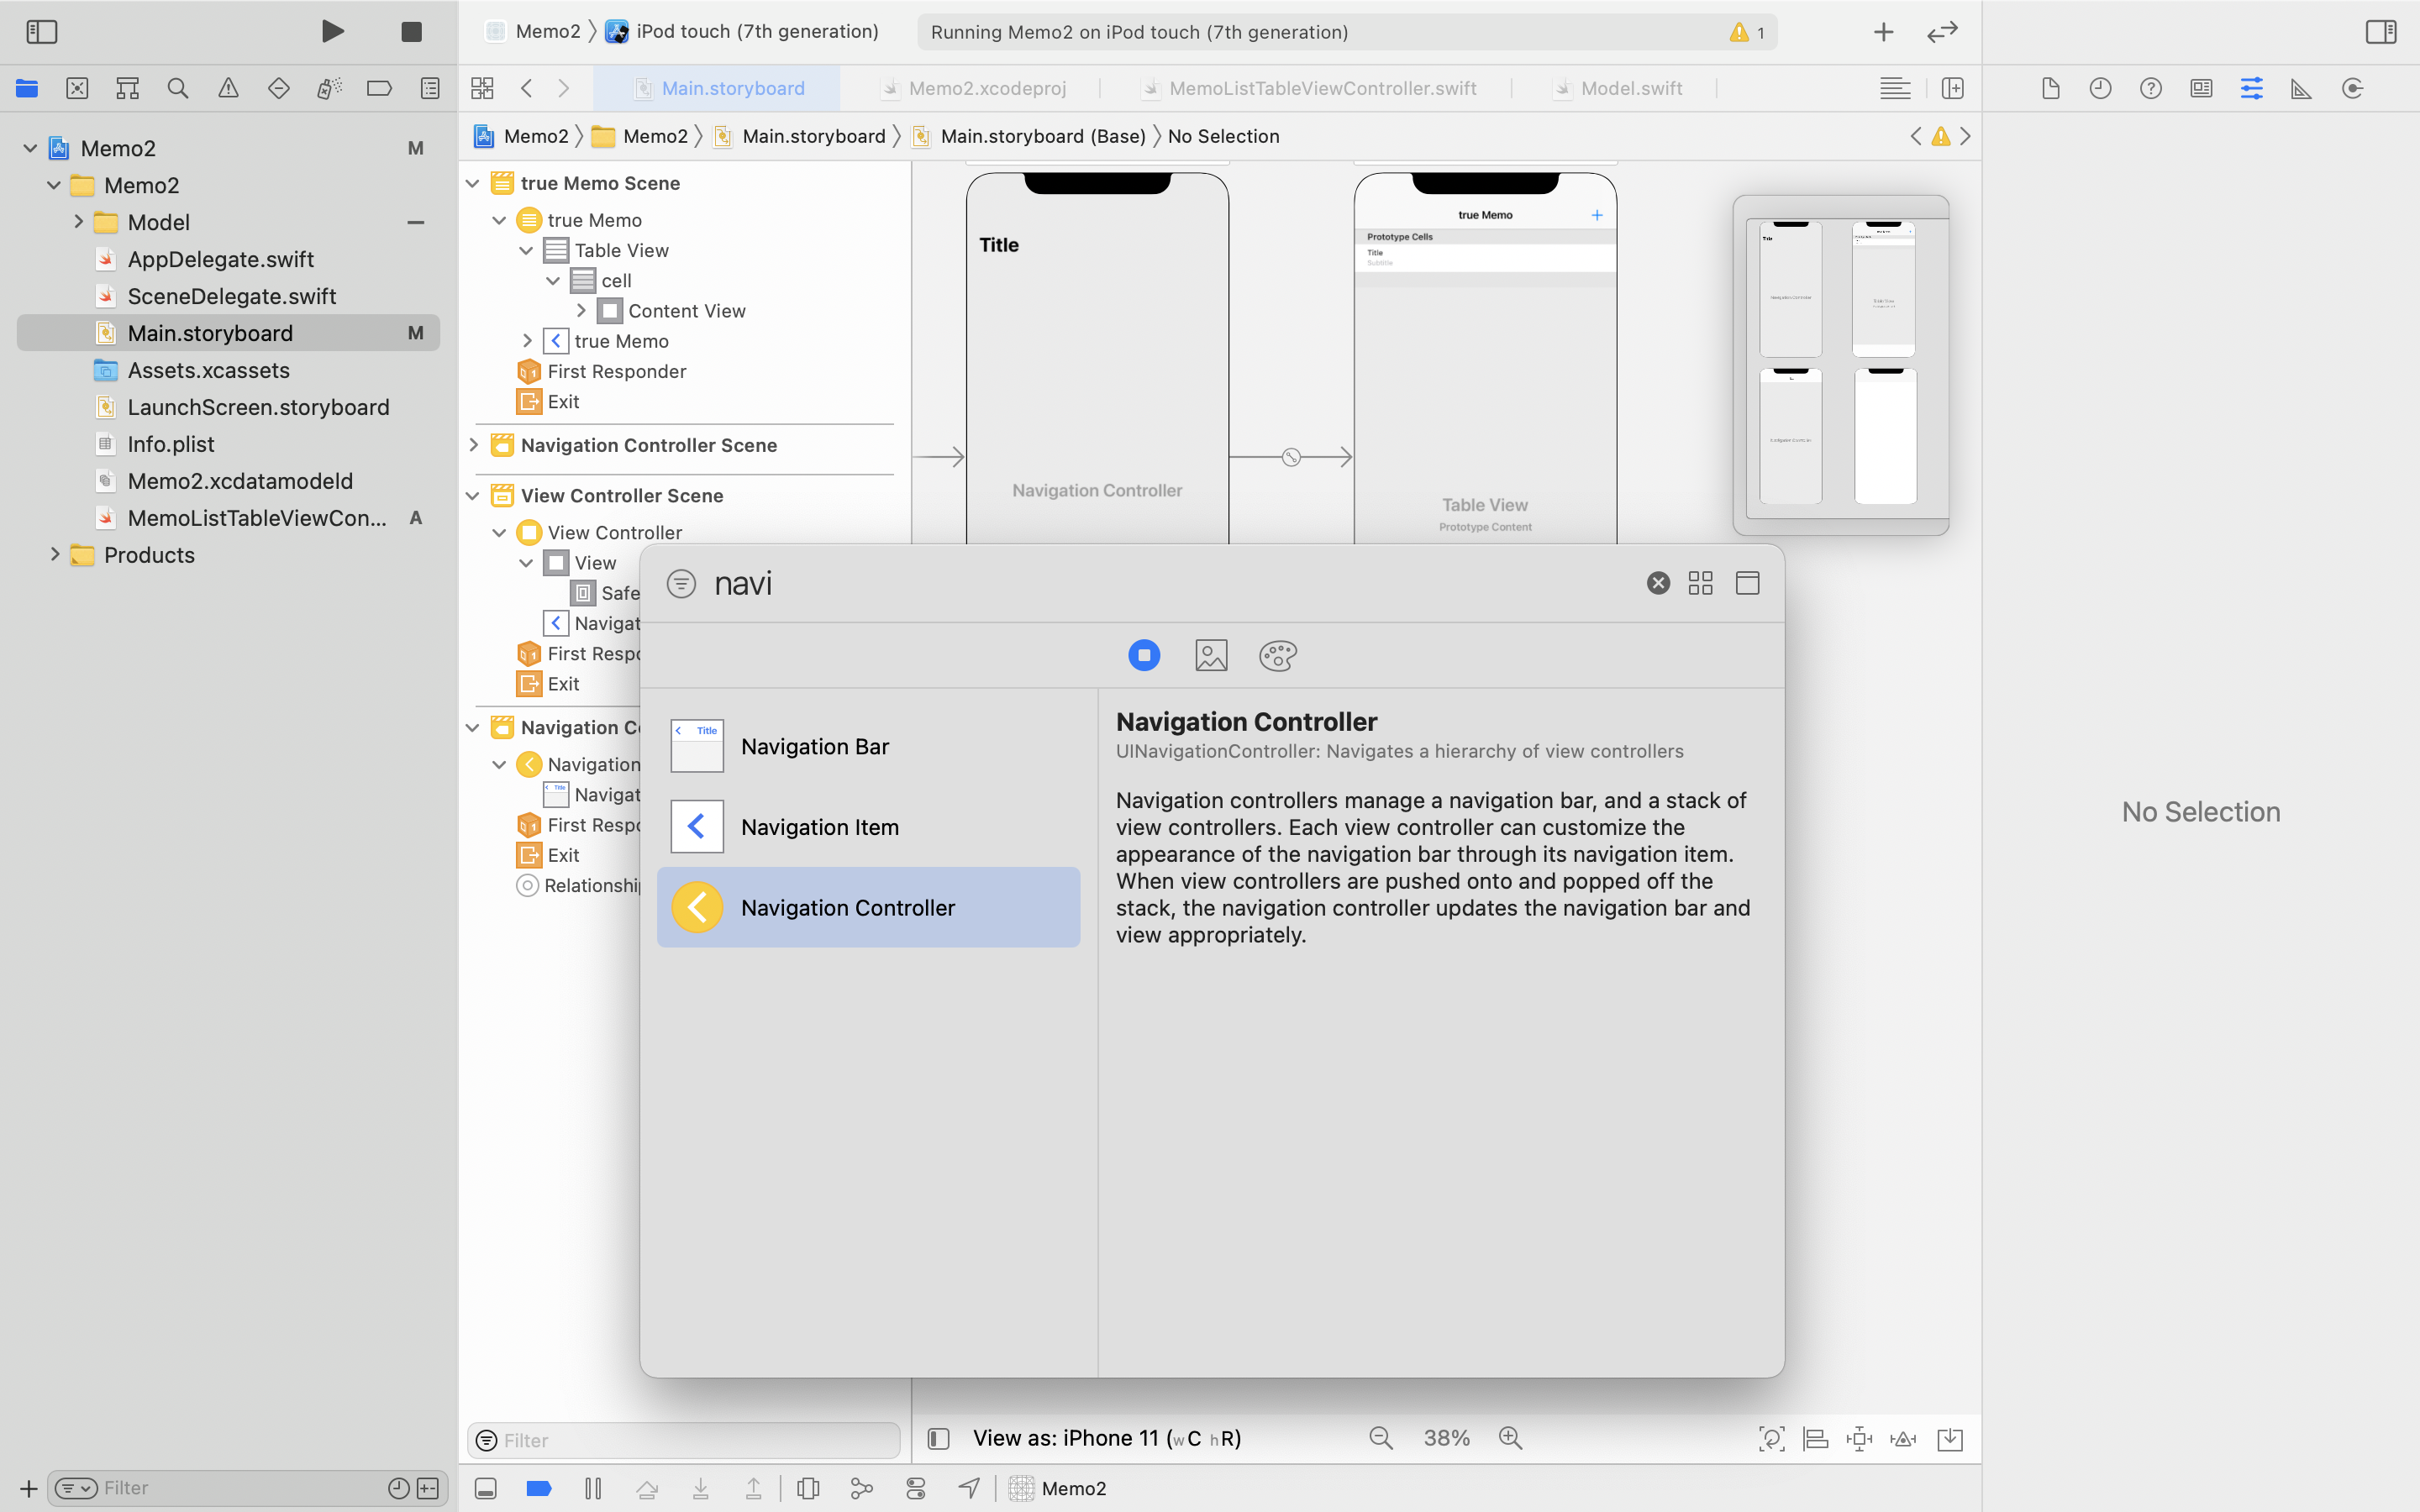
11-2. Embed In View - Navigation Contoller 클릭

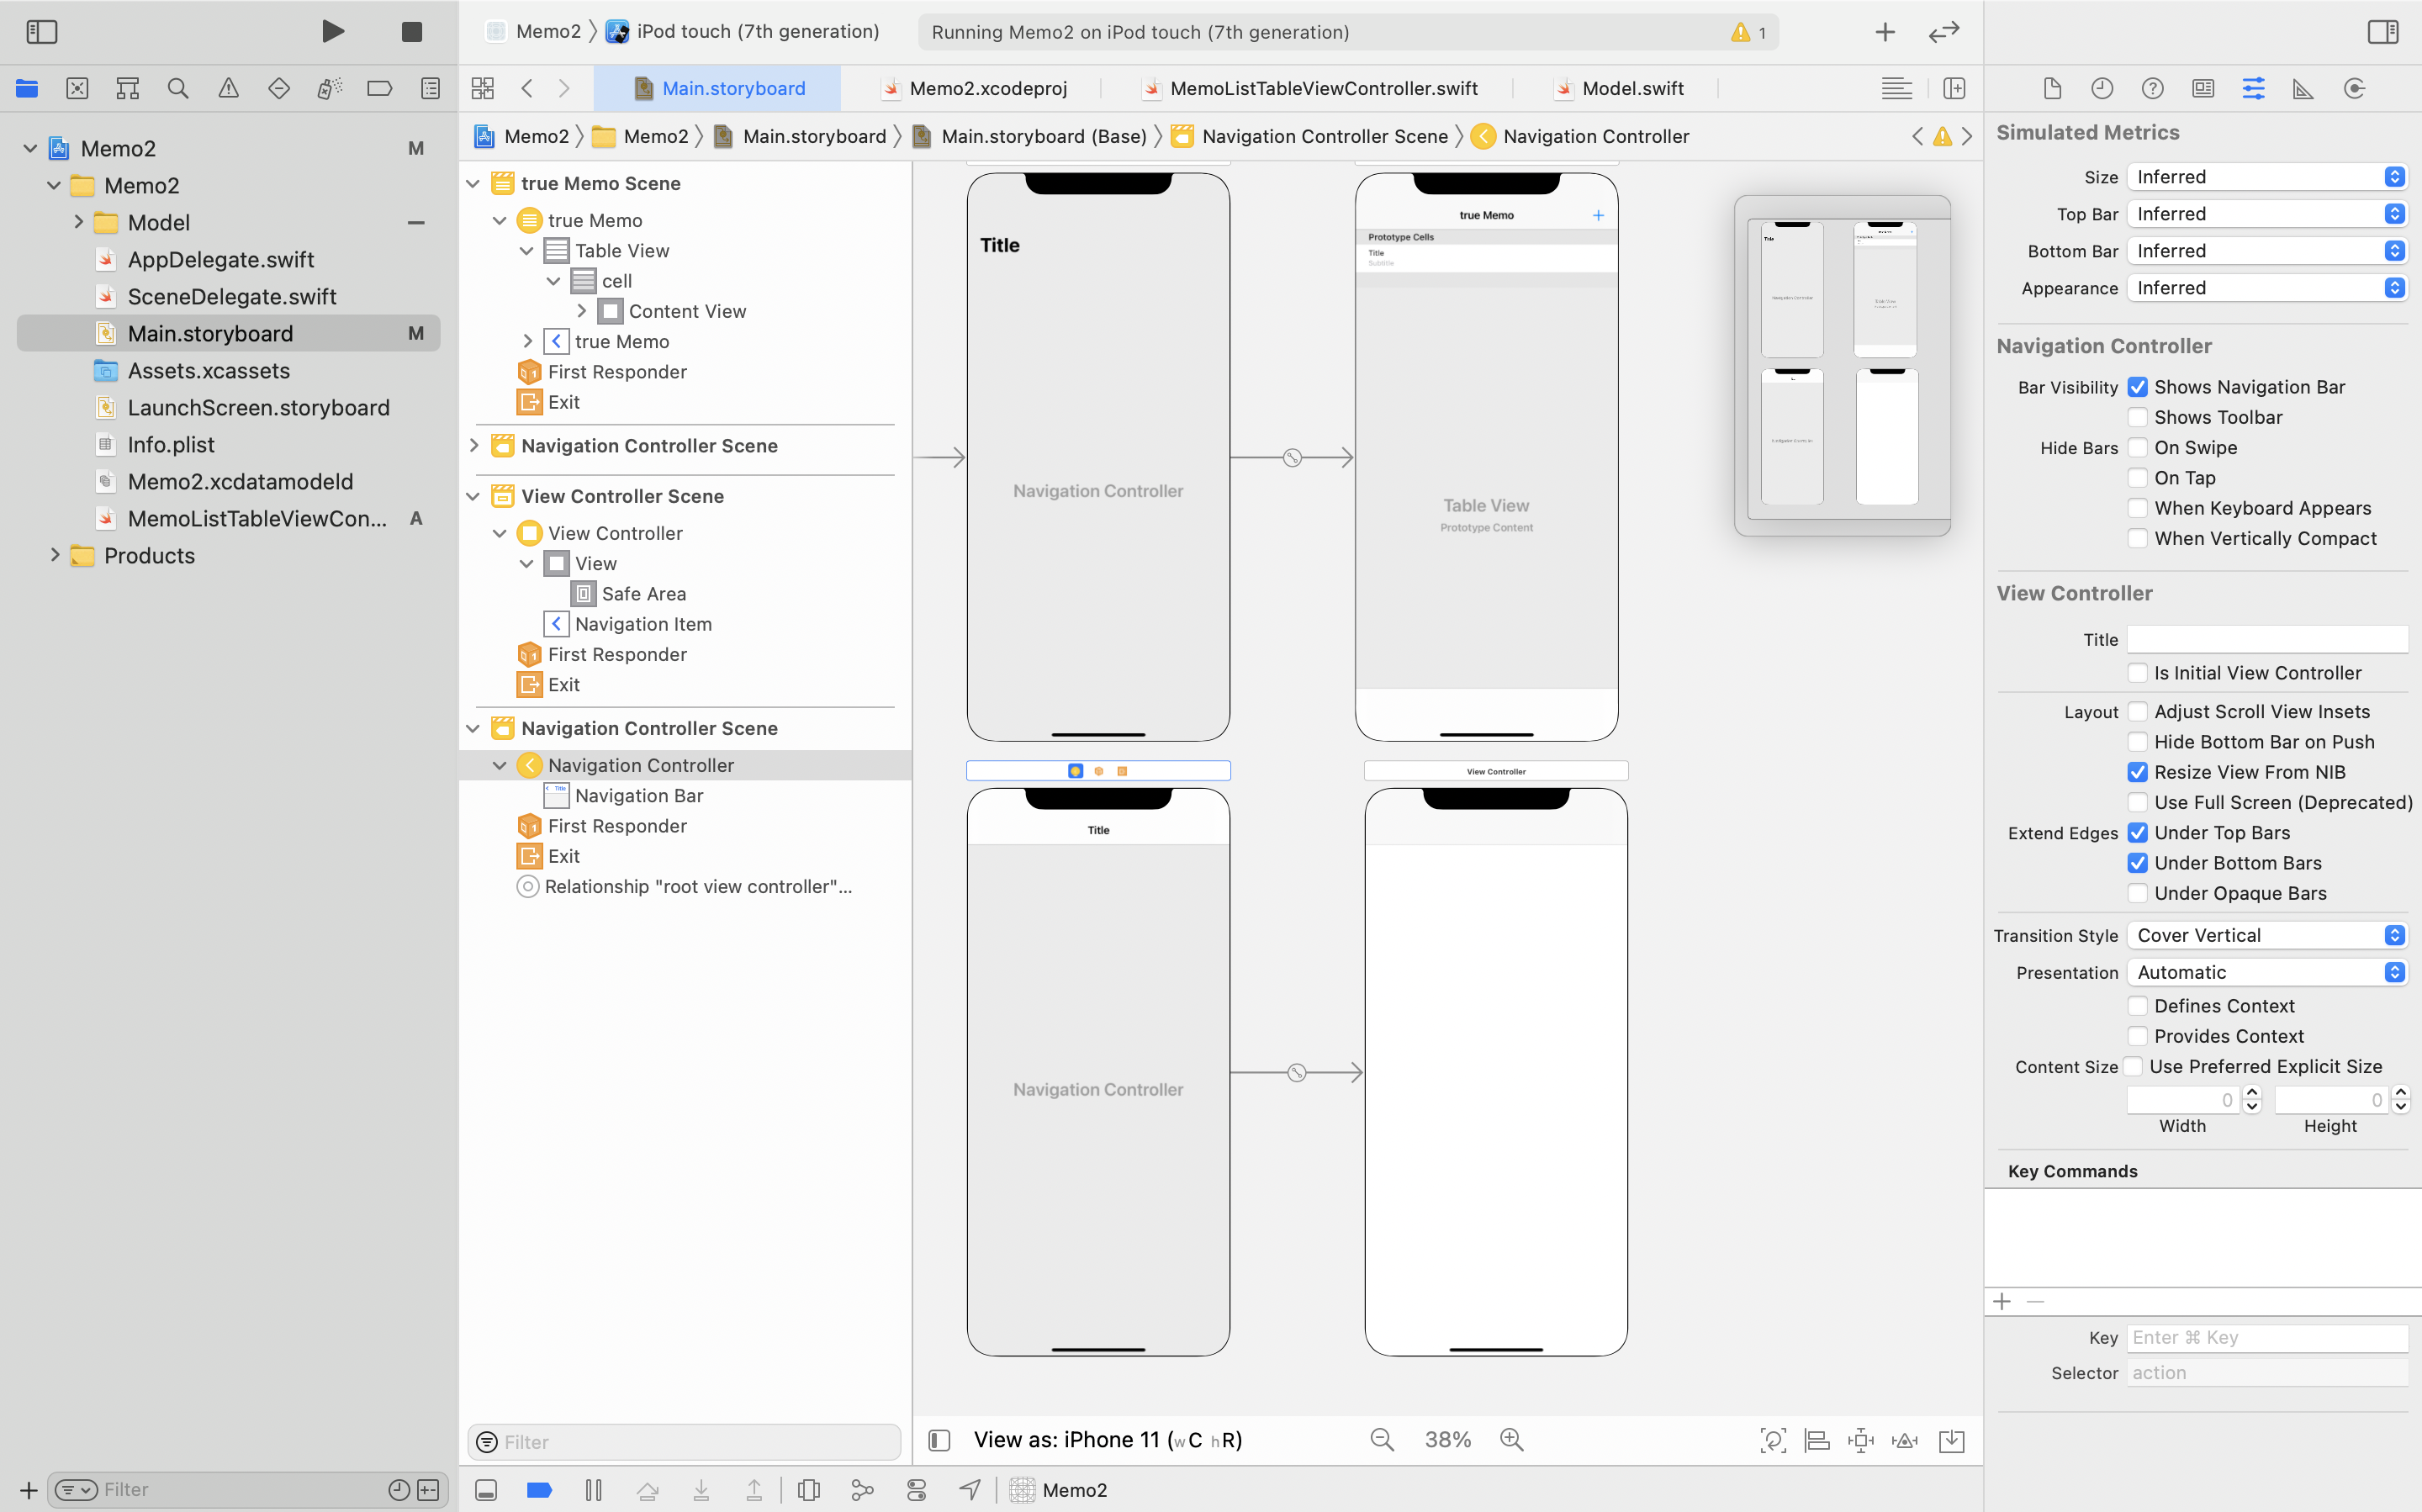
11-3. + 버튼 클릭 후 control 누르며 드래그
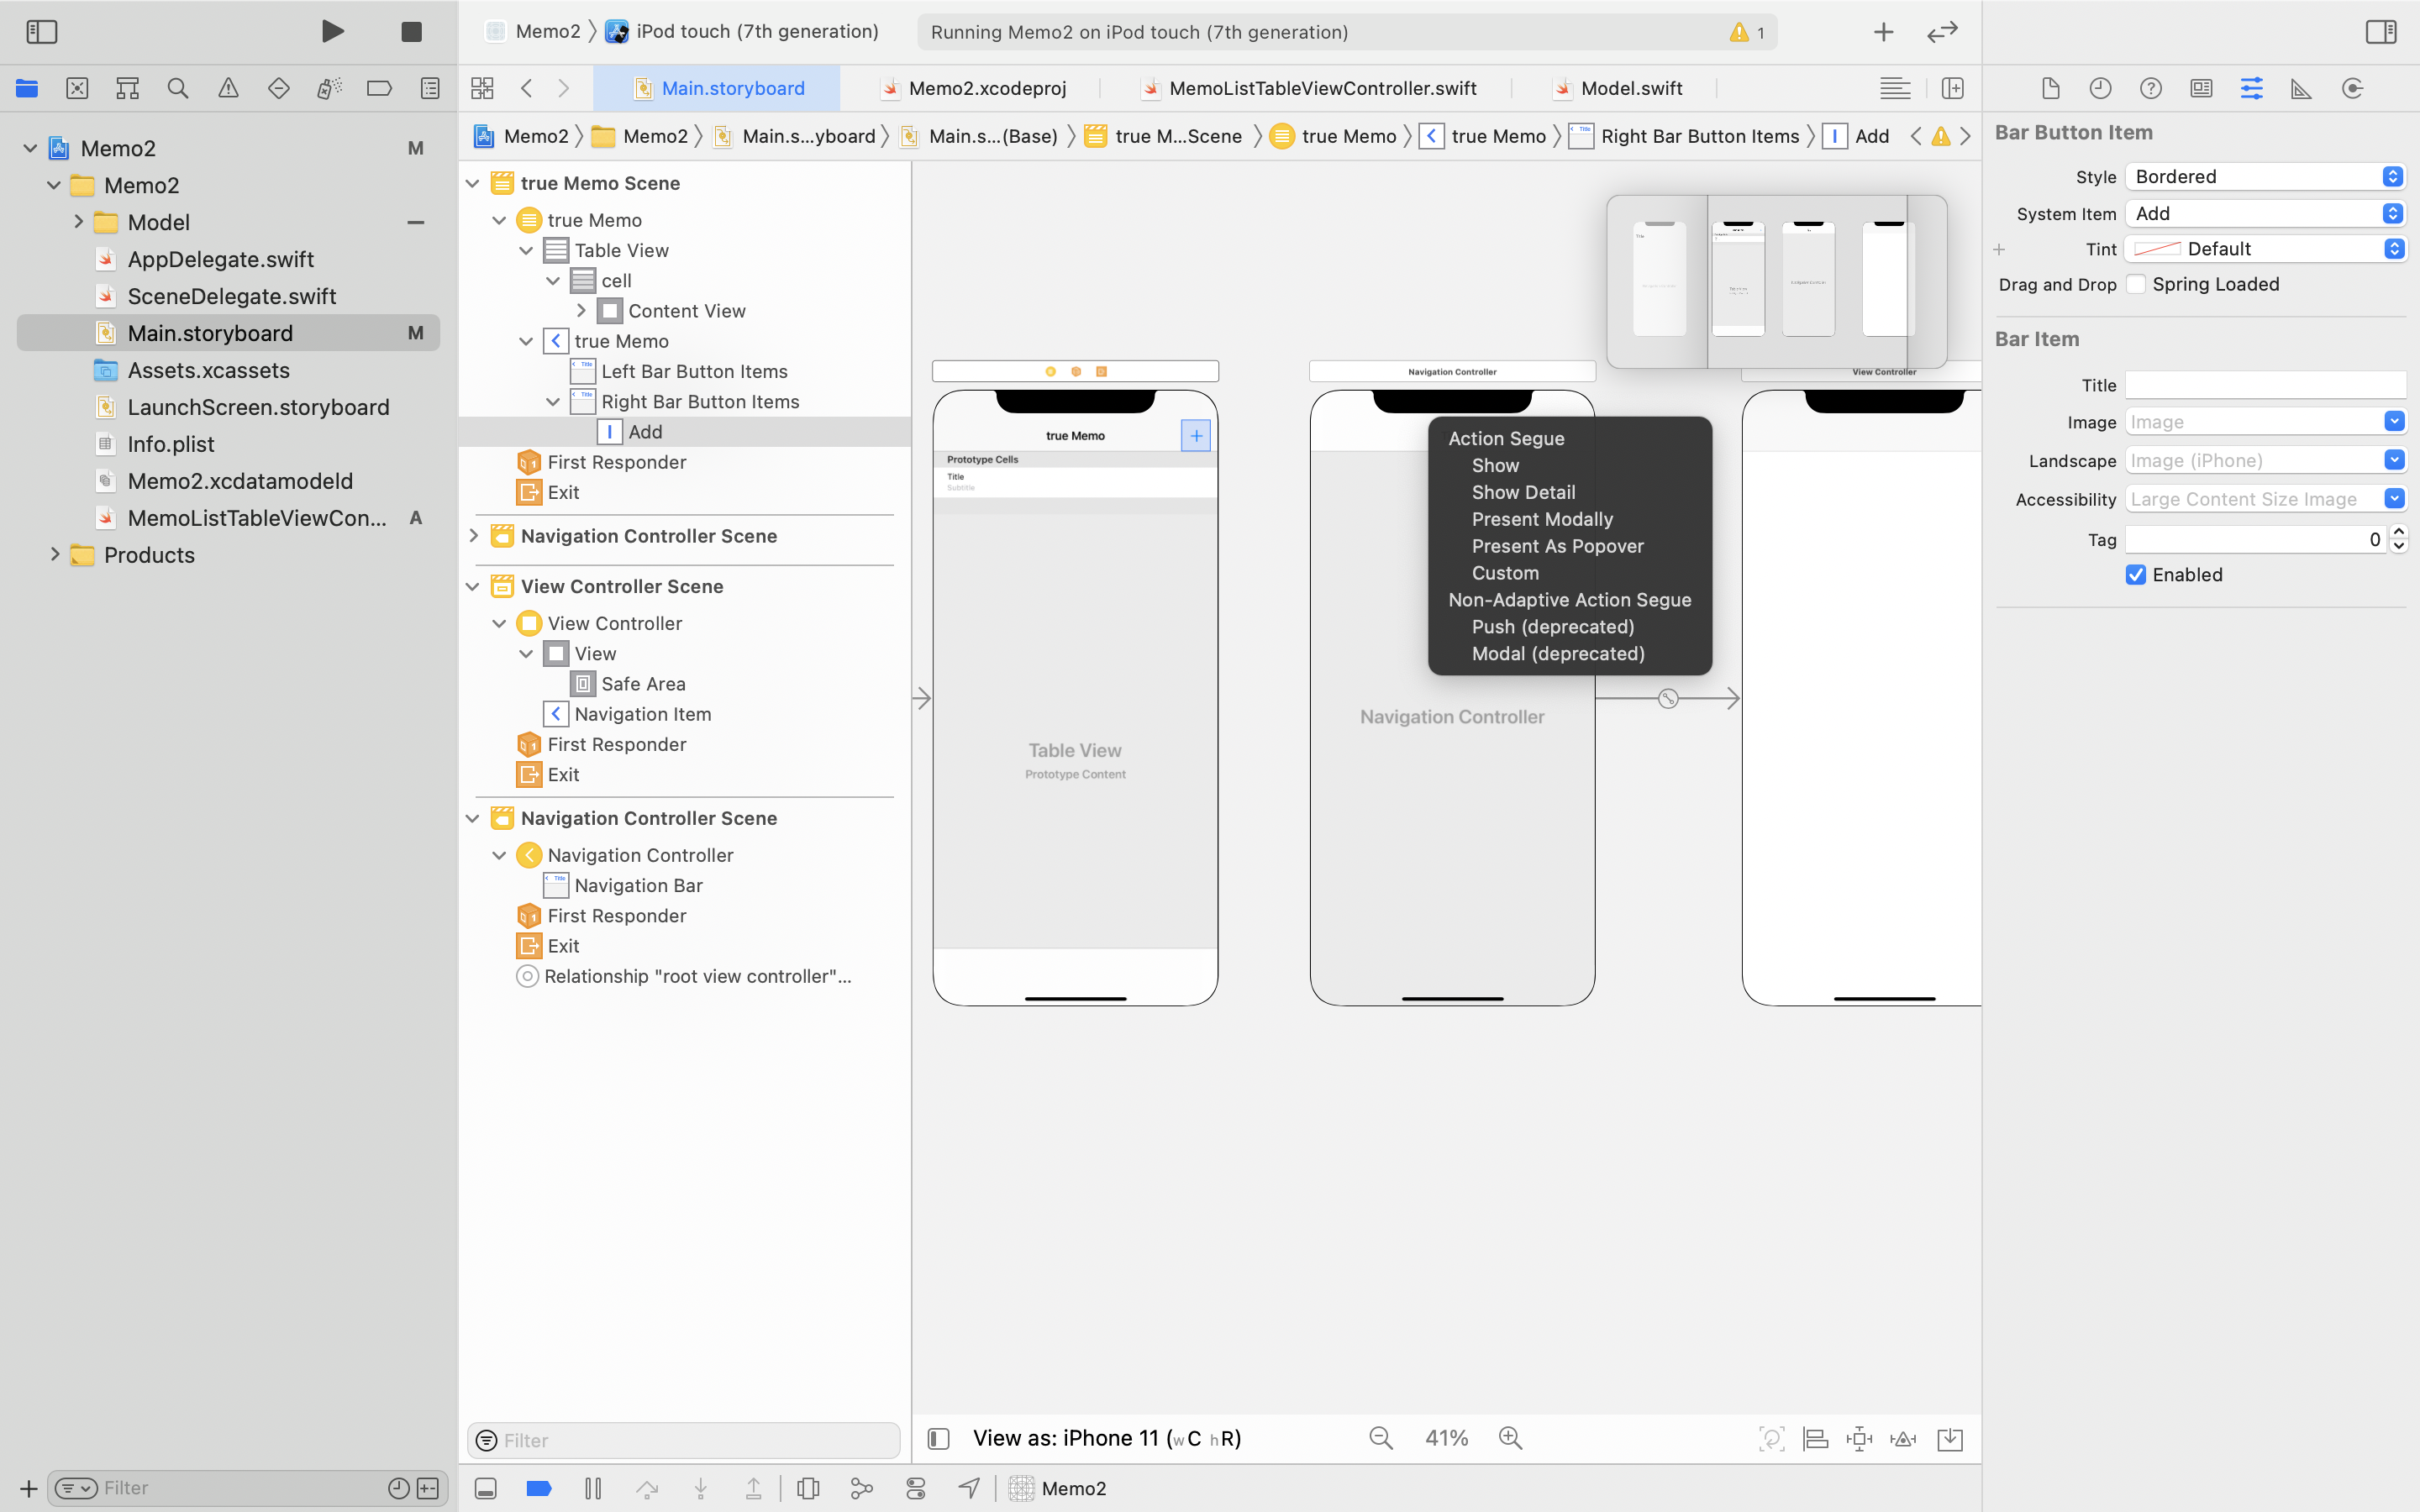
11-4. Segue 생성 : scene 사이의 전환을 처리해주는 객체

11-5. Presentation Automatic -> FullScreen
* fullscreen 이슈 처리하고 가기
[M1 Mac] XCODE(12.5.1) ios13 modal (Presentation Automatic -> FullScreen)
강의를 보며 메모 앱 프로젝트를 하던 중. 글을 입력하고 저장 시 tableView.reloadData()가 안먹는 이슈가 발생.. 원인은 ios13 모달 방식의 변경으로 뷰가 완전히 dismiss 되지 않고 viewWillAppear 호출이 안.
truecode-95.tistory.com


12. Navigation Bar 구성하기
12-1. Navigation Item으로 Title 추가

12-2. Title 두번 클릭 후 이름 변경


12-3. Bar Button Item으로 버튼 추가하기


12-4. Bar Button Item 버튼 이름 변경

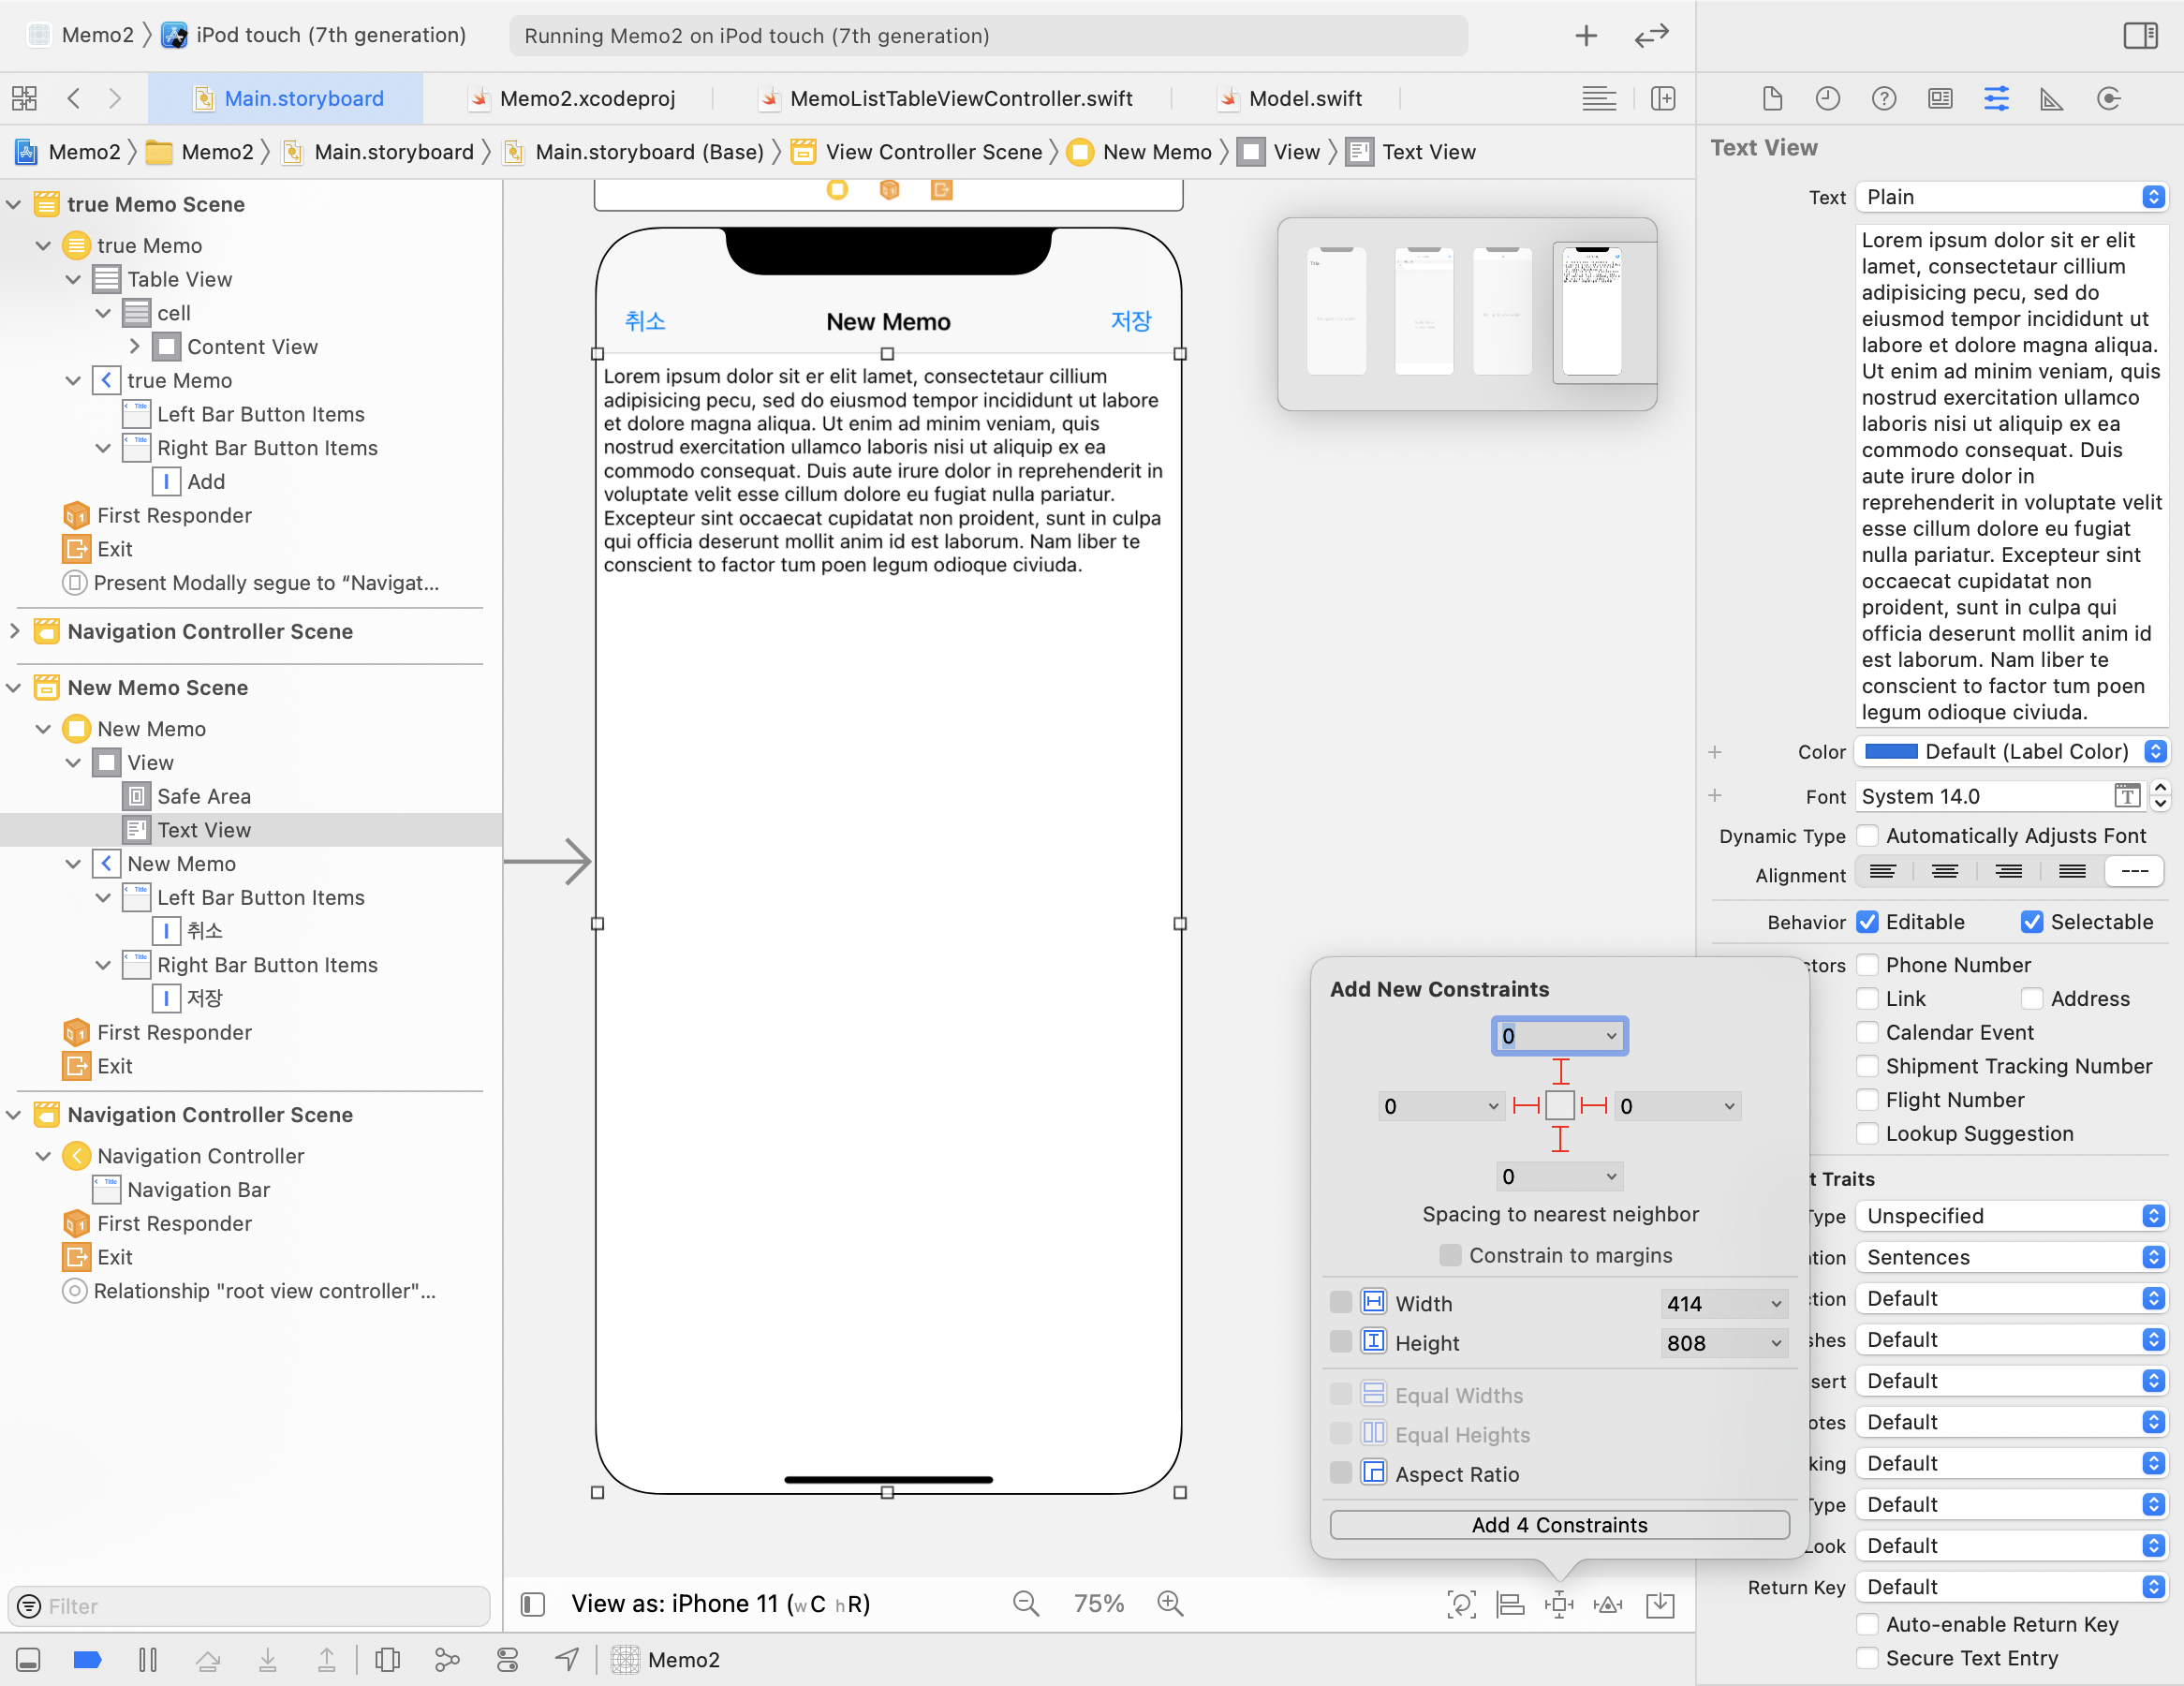
12-5. text View 추가


12-6. text View 사이즈 변경

12-7. Add New Constraints 모든 공간 여백 0으로 제약 조건 추가

13. viewController - Class 연결
13-1. Cocoa Touch Class 생성

13-2. Class명 변경

13-3. scene클릭 - Class 이름 추가

14. 취소 버튼 구현하기
14-1. 보조 편집기를 열어준다. (= 화면을 분할한다.)
[M1 Mac] XCODE(12.5.1) 화면 분할 방법
1. option + 원하는 파일 클릭 option 키를 누르고 원하는 파일을 클릭하면 자동으로 되던 화면 분할이 갑자기 안된다. -O- 다른 방법도 알아보자. 2. control + option + command를 누르면 화면이 분할되
truecode-95.tistory.com
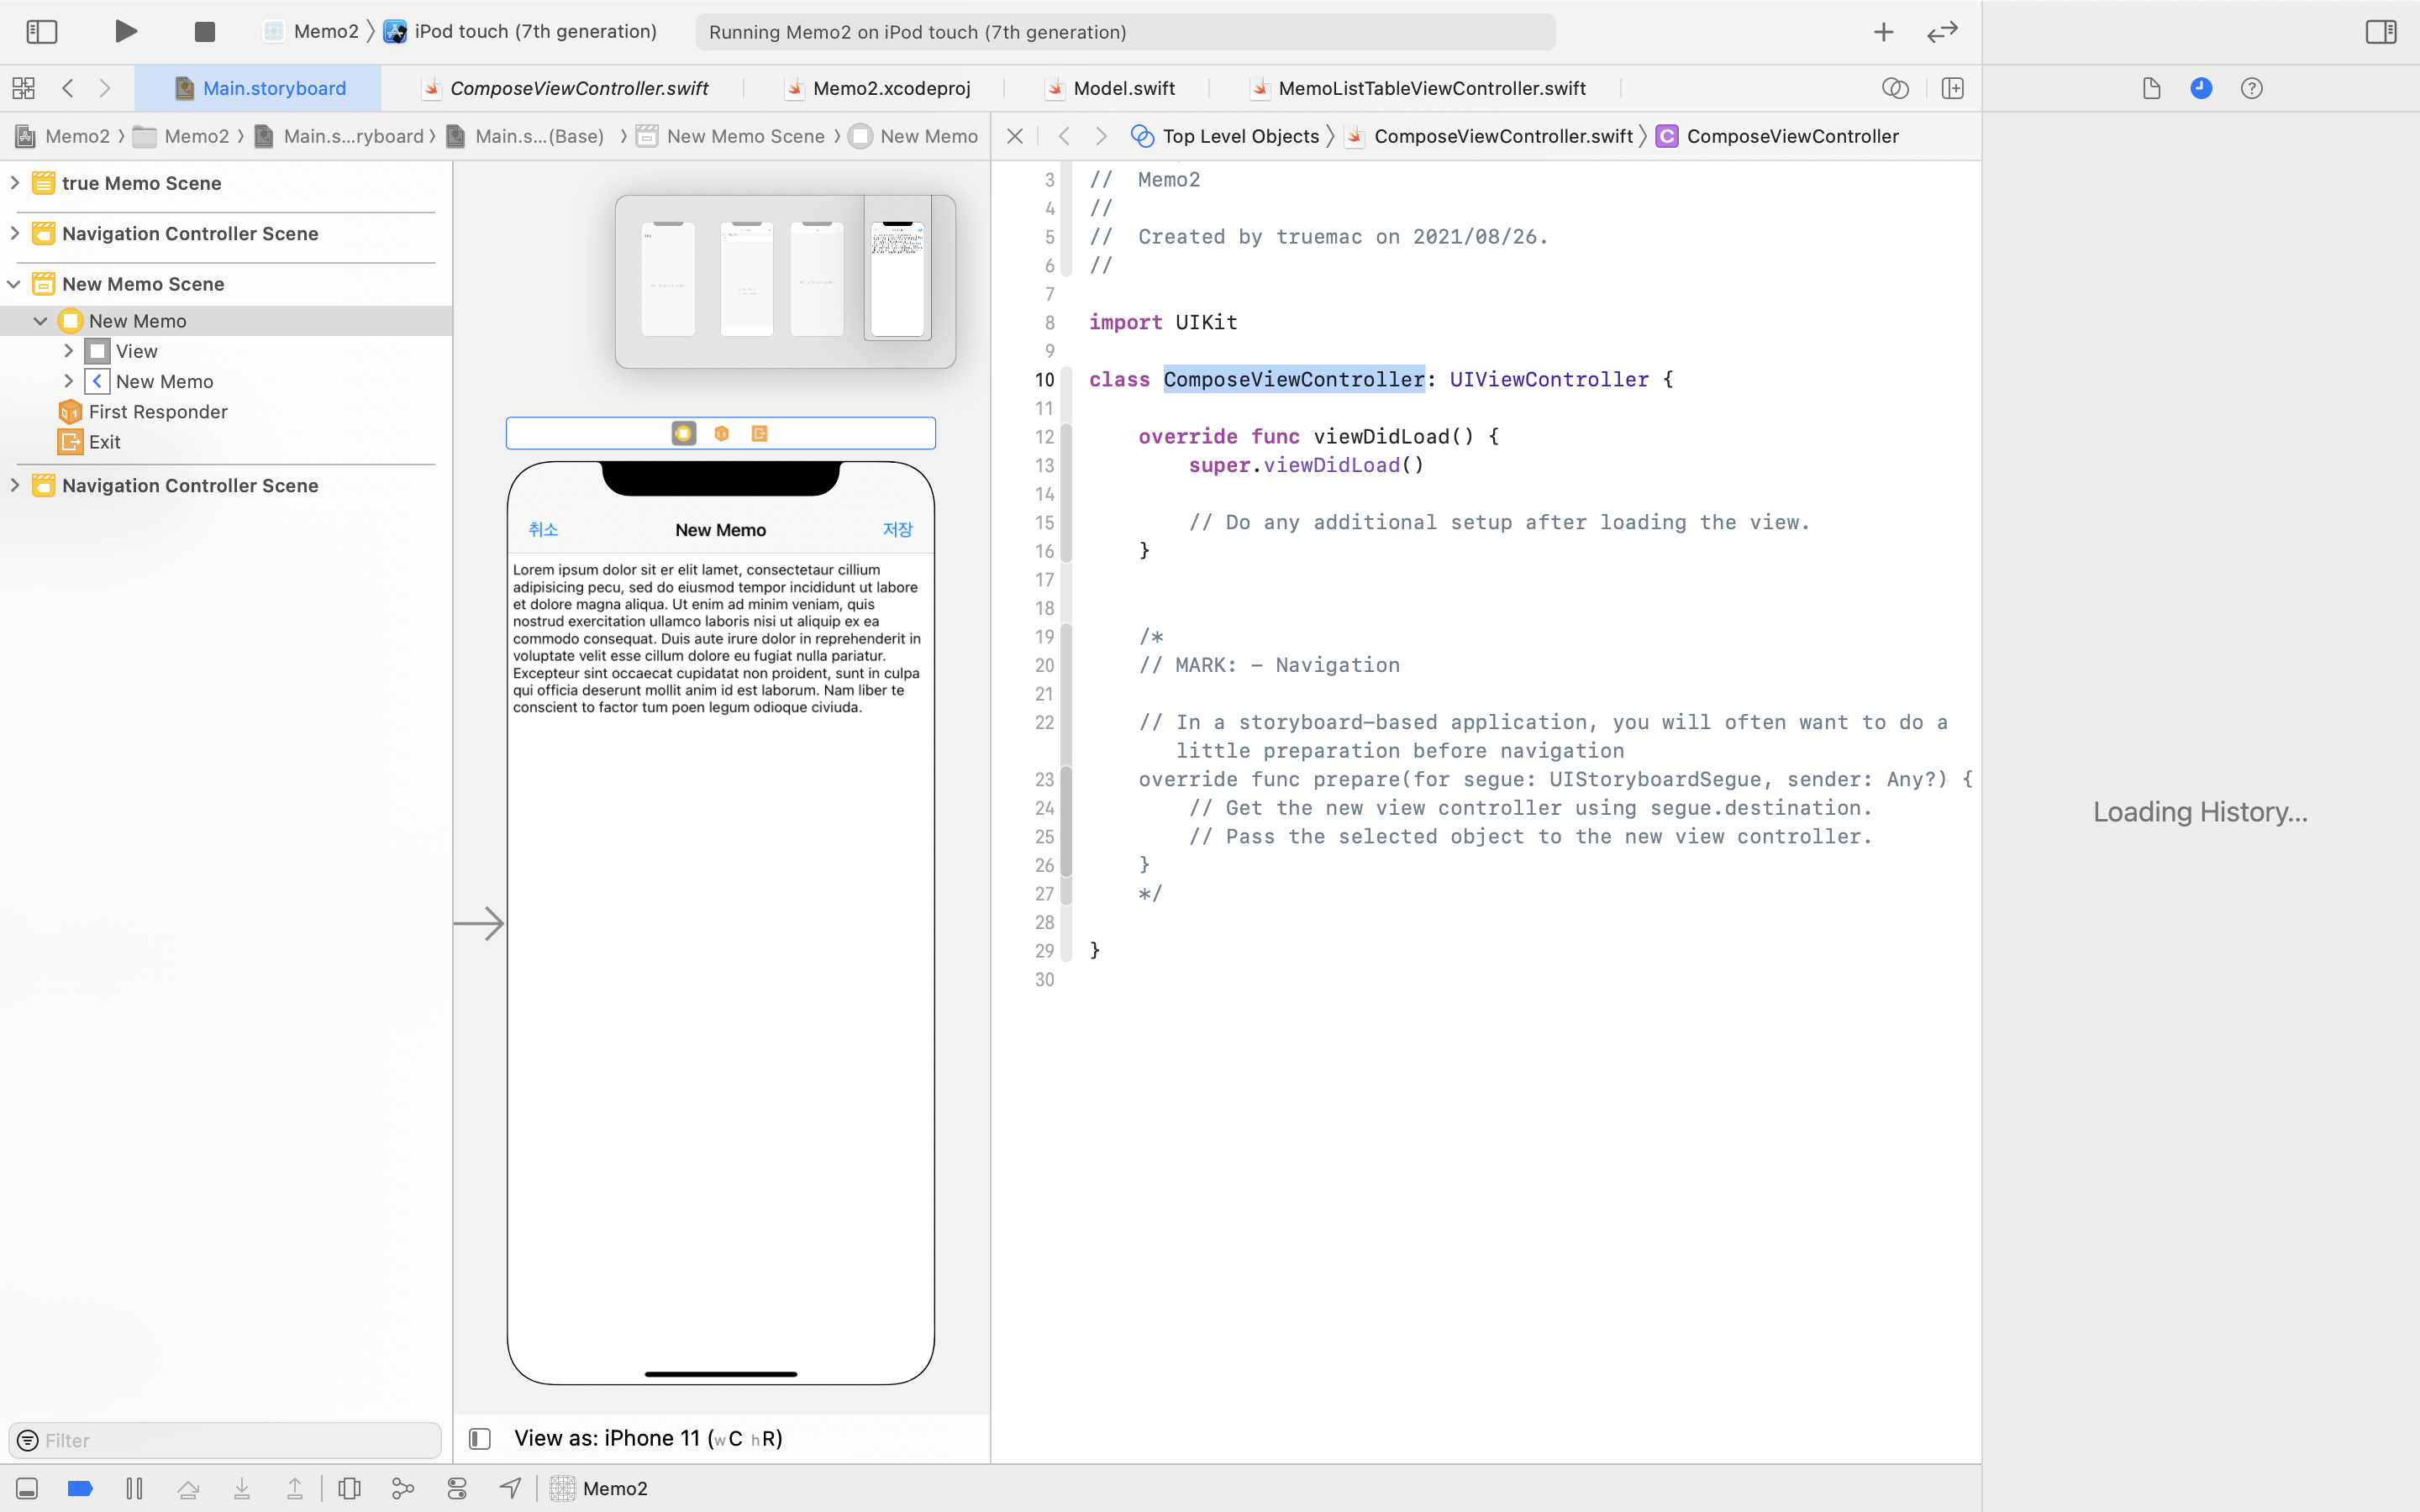
14-2. 취소 버튼 + control 키를 잡고 class 파일에 드래그
14-3. Connection Outlet -> Action 으로 변경


14-4. 화면을 닫을 때 사용하는 dismiss method 삽입

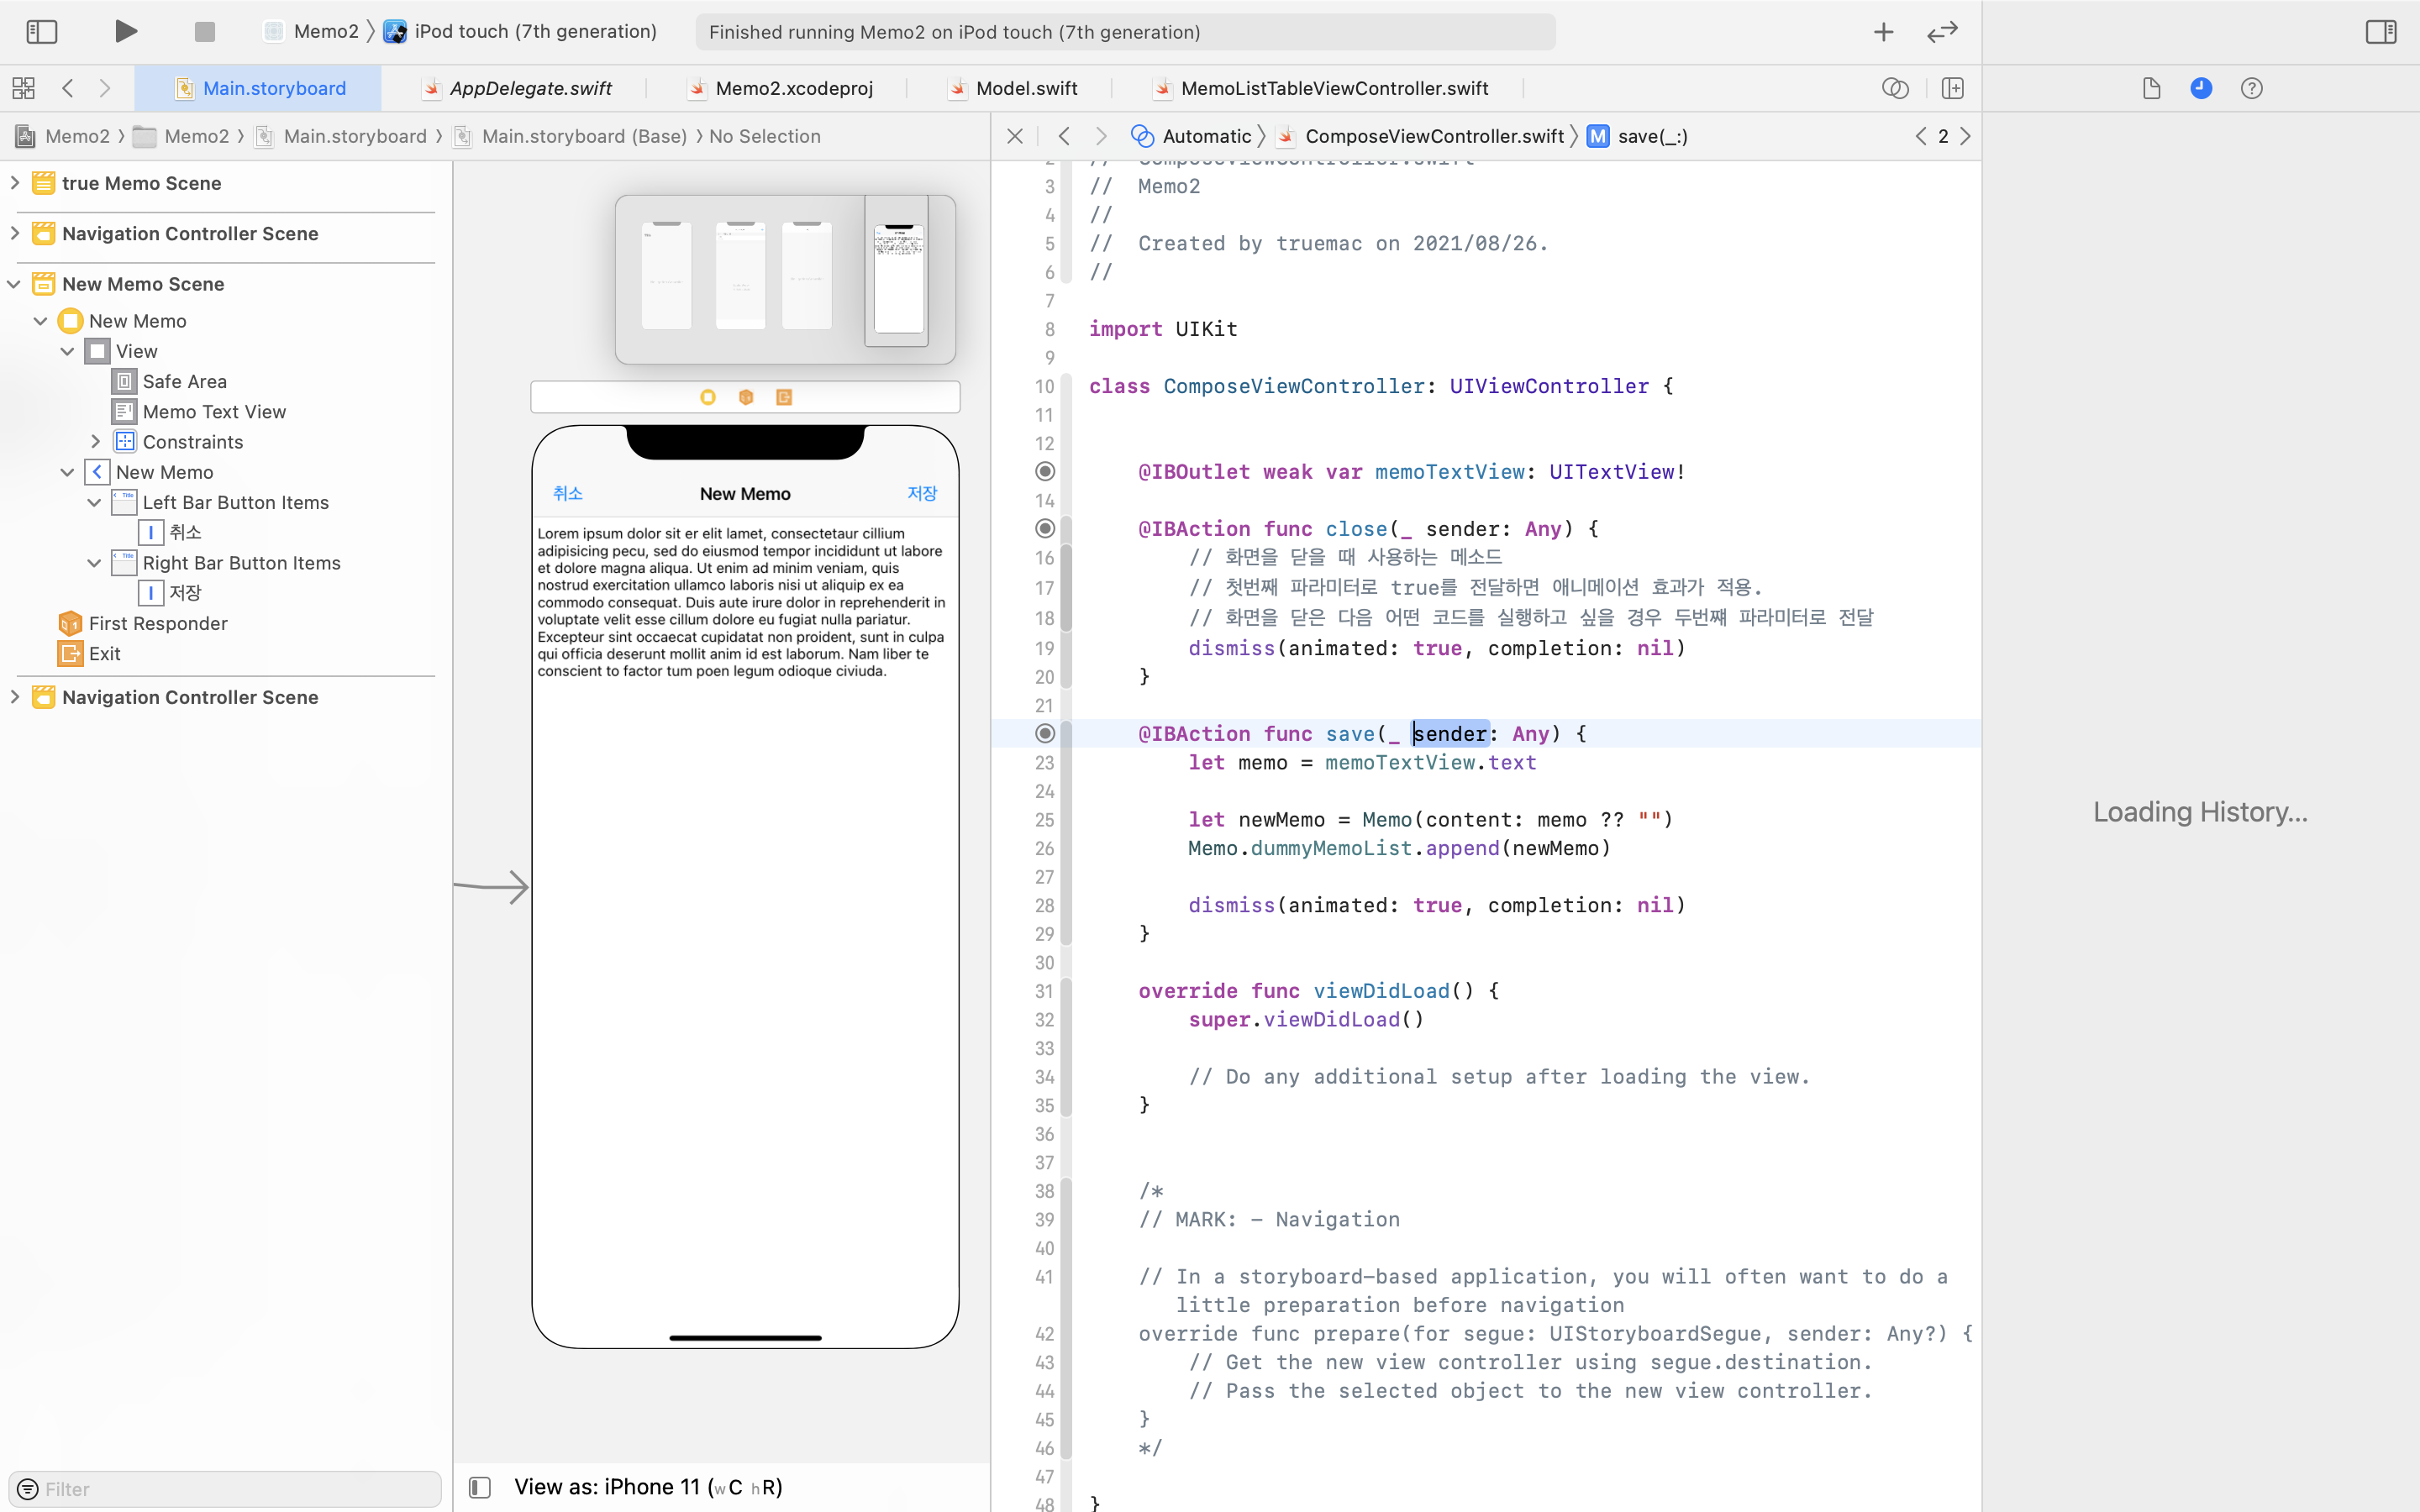
15. 저장 버튼 구현하기
15-1. 저장 버튼 + control 키를 잡고 class 파일에 드래그
15-2. Connection Outlet -> Action 으로 변경

15-3. Text View Outlet 추가

15-4. save method 코드 입력
15-5. 목록 scene 클릭

15-6. viewWillAppear 메소드 추가

Main.storyboard

ComposeViewController.swift
import UIKit

class CompostViewController: UIViewController {

    override func viewDidLoad() {
        super.viewDidLoad()
    }

    @IBAction func close(_ sender: Any) {
        dismiss(animated: true, completion: nil)
    }

    @IBAction func save(_ sender: Any) {
    let memo = memoTextView.text
    let newMemo = Memo(content:memo ?? "")
        Memo.dummyMemoList.append(newMemo)
        dismiss(animated: true, completion: nil)
    }

    @IBOutlet weak var memoTextView: UITextView!

}
MemoListTableViewController.swift
import UIKit

class MemoListTableViewController: UITableViewController {

    let fomatter: DateFormatter = {
        let f = DateFormatter()
        f.dateStyle = .long
        f.timeStyle = .none
        f.locale = Locale(identifier: "Ko_kr")
        return f
    }()

    override func viewDidLoad() {
        super.viewDidLoad()
    }

    override func viewWillAppear(_ animated: Bool) { super.viewWillAppear(animated)
        tableView.reloadData()
        print("viewWillAppear",Memo.dummyMemoList.count)
    }

    override func tableView(_ tableView: UITableView, numberOfRowsInSection section: Int) -> Int {
        // #warning Incomplete implementation, return the number of rows
        return Memo.dummyMemoList.count
    }

    override func tableView(_ tableView: UITableView, cellForRowAt indexPath: IndexPath) -> UITableViewCell {
        let cell = tableView.dequeueReusableCell(withIdentifier: "cell", for: indexPath)
        let target = Memo.dummyMemoList[indexPath.row]
        cell.textLabel?.text = target.content
        cell.detailTextLabel?.text = fomatter.string(from: target.insertDate)

        return cell
    }

}
그 후 개발은 (5), (6) 편으로..